
Your cart (0)
Your cart is empty
Tax included and shipping calculated at checkout
Your cart is empty
Tax included and shipping calculated at checkout

Last Updated: October 24, 2026
Quick Summary
Mountain bike suspension setup starts with setting sag, the amount your suspension compresses under your body weight before hitting anything. Most manufacturers recommend 25-30% sag on your fork and 30-35% on your rear shock, but your bike's manual is the best starting point. Adjust one parameter at a time, ride for 10 minutes, then assess before making further changes.
Getting your mountain bike suspension setup right starts with understanding what you're adjusting. Your fork and rear shock are air springs, dampers, or both, working together to absorb impacts, maintain traction and keep your wheels grounded.
Most riders treat suspension as a black box: pump it up, hope it feels right, move on. But your fork and shock have only a handful of adjustable parameters, and once you understand each one, dialling in a setup becomes straightforward.
Suspension tuning isn't about chasing a magic number. It's about understanding how your bike should behave on the trail and making small, deliberate changes to get there.
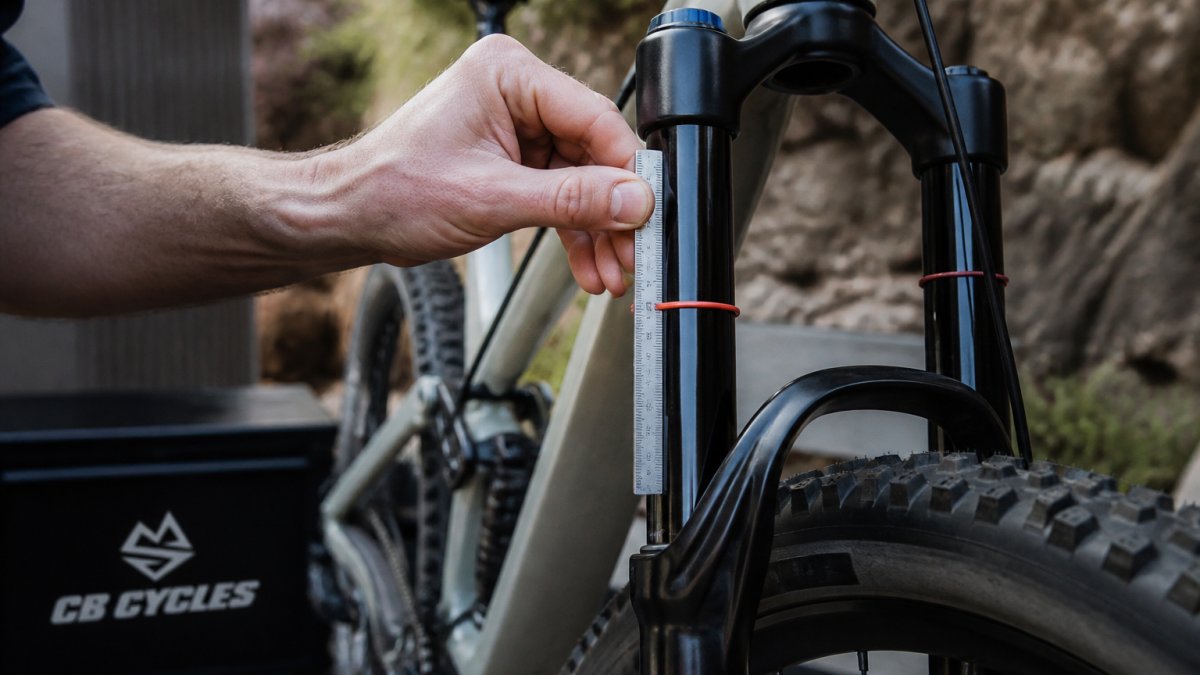
Sag is where your suspension sits under your body weight before you hit anything. It's the single most important number in your setup.
Too stiff and your fork won't absorb small bumps; too soft and it dives under braking or sits too deep in its travel. The same applies to your rear shock. Sag is the bridge between compliance and support.
To measure sag properly, you need an accurate way to see how much your suspension compresses. A RockShox Digital High Pressure Shock Pump - 300 PSI gives precise readings and a fine-tune bleed valve, making small adjustments repeatable.

Most manufacturers recommend starting with 25-30% sag on your fork and 30-35% on your rear shock as part of your mountain bike suspension setup, but this varies by bike design and preference. Your bike's manual is the best starting point.
Book professional bike suspension service if you'd rather have an expert dial in your sag and suspension geometry. Otherwise, measure at the same time of day, in the same gear, on the same surface each time, consistency matters more than perfection.
RockShox Digital High Pressure Shock Pump – 300 PSI →
Your weight determines your spring rate, a heavier rider needs a stiffer spring to hit the same sag percentage. Learn how to tune suspension across different rider weights and terrain types to dial in your setup properly. Many riders get stuck copying a friend's pressure and wondering why it feels wrong.
Start with your riding weight, you plus gear, in kilograms, then cross-reference your bike's manual or the shock manufacturer's chart for the recommended pressure or spring rate. That's your baseline.
Terrain changes how you tune. Technical, rocky terrain rewards a slightly firmer setup with more mid-travel support; flowing trails with big jumps benefit from more compliance; steep, loose descents often feel better with a touch more rebound damping.
E-bikes and heavier bikes shift these numbers, the extra weight of a motor and battery means higher air pressure or a stiffer spring rate than an equivalent lightweight trail bike. Don't assume your mate's setup will work just because you ride similar trails.
The key is one change at a time: adjust air pressure, ride for 10 minutes, assess, then adjust rebound or compression damping if needed. Changing three things at once guarantees confusion. If you need replacement dampers, seals or other suspension components, Avinox Spare Parts are available, and we can help source parts for other brands too.
How your weight and where you ride shape your suspension tuning.
| Terrain Type | Setup Character | Key Adjustment |
|---|---|---|
| Technical, rocky | Firmer with mid-travel support | Increase air pressure |
| Flowing trails with jumps | More compliant | Decrease air pressure |
| Steep, loose descents | Responsive | Add rebound damping |
| E-bikes and heavier rigs | Stiffer spring rate | Higher air pressure |
| Lightweight trail bikes | Standard spring rate | Baseline pressure |
Sag targets vary by riding style and bike design. Trail riders typically run 25-30% sag on both fork and rear shock, while aggressive enduro or downhill riders may prefer 30-35%. Measure sag by compressing the bike fully under your weight, then checking how far the suspension has moved from fully extended. Your bike's manual or suspension manufacturer provides specific guidance for your model. Start at the midpoint for your weight and terrain, then adjust based on trail feel.
Rebound damping controls how quickly your suspension extends after compression. Too slow and the bike feels sluggish; too fast and it bounces excessively. Start with the manufacturer's recommended setting, then turn the adjuster clockwise (slower) or anticlockwise (faster) in small increments. Test on a smooth section of trail after each adjustment. Most riders find a sweet spot where the suspension settles calmly without harshness. Front and rear rebound should work together, balance them by testing both separately, then in combination.
Heavier riders need higher air pressure or stiffer spring rates to achieve target sag and prevent excessive bottom-out. Lighter riders require lower pressure or softer springs. Most suspension manufacturers provide setup charts that recommend starting pressures or spring rates by body weight. Use those as your baseline, set sag to your target, then test on trail. Fine-tune from there based on how the bike feels through rough terrain, jumps and corners. Shock pressure and spring rate interact with sag, adjusting one affects the others.
Set up the rear shock first, as it determines overall suspension balance and how the bike sits in its travel. Once the rear is dialled, adjust the fork to match the feel and sag percentage. This order helps you build a cohesive setup rather than chasing your tail. Start with sag on both ends, then move to damping adjustments. Some riders prefer to set baseline pressures, ride a short test, then refine, this avoids overthinking on the stand.
Getting your suspension dialled transforms how your bike feels and handles. The process is simpler than most guides suggest, and the tools you need are straightforward. If you're running a modern mountain bike or e-MTB and want professional guidance on setup, contact CB Cycles to book a suspension service or discuss your bike's specific needs.
